How To Hike The Kepler Track
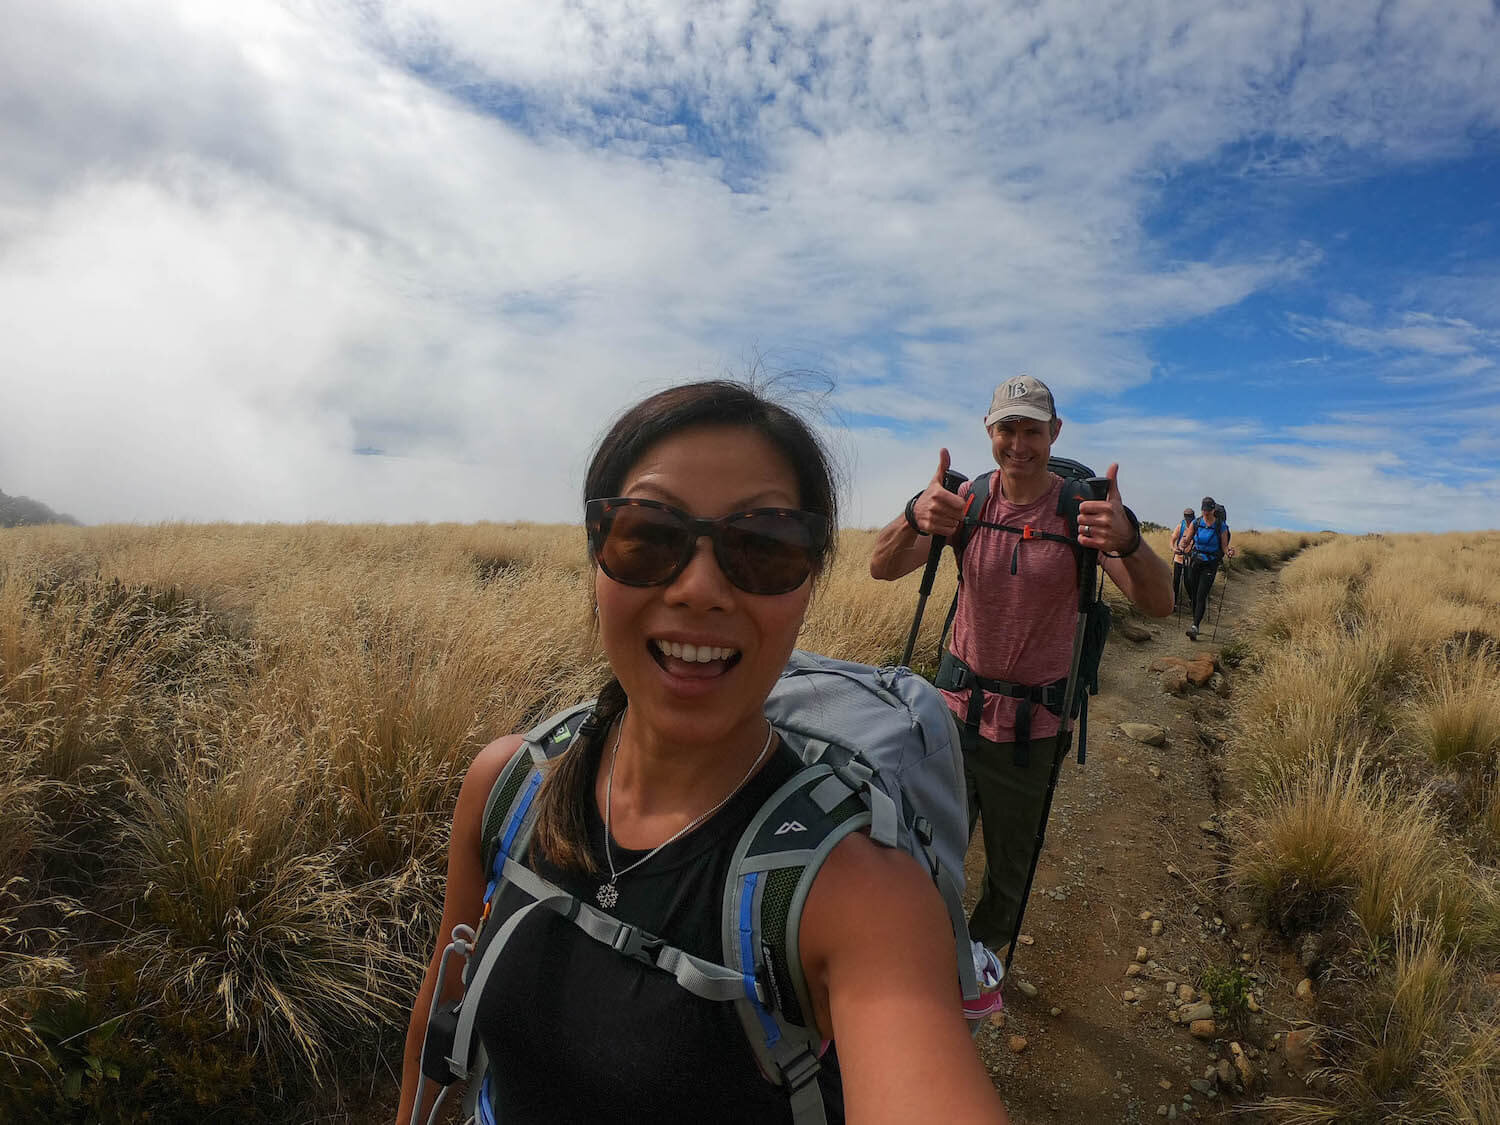
We’d spent a good couple of hours hiking uphill through native beech forest. Initially surrounded by dense, lush greenery, the landscape began to change ever so subtly. A little less green, a little less dense, a little brighter. Suddenly we popped up above the treeline and we all shouted for joy! We were welcomed with stunning panoramic views and a much appreciated flatter track.
The Kepler Track was our very first New Zealand Great Walk and man oh man, it did not disappoint!
A Great Walk is considered a premier track which passes through spectacular and diverse scenery. Tracks are well-formed, easy to follow and accessible from major towns. There are ten Great Walks in New Zealand including the Kepler Track.
It was also our first time staying in huts and truth be told, I was a little nervous about it. I wasn’t sure what to expect and I’m not the best at roughing it but staying in a hut is a quintessential Kiwi experience so I knew I had to give it a go.
Read on to see how it all went down. I share everything you need to know about hiking the Kepler Track, my tips as well as a downloadable packing list.
About The Kepler Track
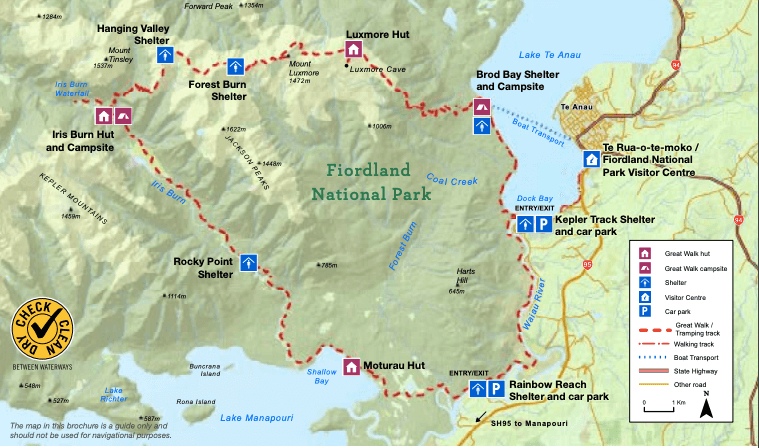
The Kepler Track is a 60km loop with the start of the track about 5km from the town of Te Anau. The hike is generally completed over 3 - 4 days. We did it in 3 nights and 4 days staying at all huts along the way and found that to be a good pace. We wouldn’t have wanted to skip any huts however people do! In fact, every year there is an event called the Kepler Challenge - an annual event started in 1988 where athletes race to complete the loop. In 2017, athlete Sam Maccutcheon finished the track in 4 hours and 49 minutes! My legs hurt thinking about it!
What I love about the Kepler Track is the varying terrain and ever-changing scenery. We hiked through native beech forest, across exposed sparse ridgelines and over fragile wetland. It was truly majestic to see the natural surrounds evolve and change to the conditions along our journey.
SOURCE: DOC
Difficulty
The Kepler Track is graded as intermediate. Being a Great Walk, the track is well-formed, well marked and has signage/markers. You can do the hike in either direction - the most common is to do it in an anti-clockwise direction, heading to Brod Bay first. This way has a big climb at the start followed by a steep descent and then a gradual decline.
I would say I am reasonably fit but I do have trouble with my knees, particularly on the downhill. I prepared by strapping my knees with kinesiology tape and using hiking poles. The track isn’t necessarily that technical, it’s just a lot of hours and distance. My legs were pretty tired by the end of it. But having the company of an 8 and 10 year old was great motivation - hard to complain when you see them powering through the hike!
SOURCE: DOC
When To Hike The Kepler Track
The best time to hike the Kepler Track is during the Great Walks season from November to April. For most activities in the South Island of New Zealand, this is considered the ‘summer’ season. Out of season (between May and October), conditions can be a bit more variable and potentially hazardous. This is not to say you can’t hike the track during this time, you just need to ensure that you pack appropriately and have the most up to date information about the current conditions.
STOKED TO BE ABOVE THE TREE LINE!
CHATTING AWAY AS USUAL…
Bookings And Accommodation
You don’t need to book to hike the Kepler Track but you do need to book accommodation if you are planning to hike during the Great Walks season (October to April). The dates change slightly each year so be sure to check out the Department of Conservations (DOC) website for the latest dates.
DOC operates 3 huts and 2 campsites along the track.
The Kepler Track is incredibly popular during the Great Walks season, so I recommend booking your huts or campsites as early as you possibly can. Bookings open at the end of April for the following season. We booked all the huts on the first day that they opened bookings. I’m not sure how quickly the bookings fill up but when we did the hike in March, all of the huts were fully booked.
Outside of the Great Walks season, you don’t need to book your accommodation but you do need to buy backcountry hut and campsite tickets. Facilities are greatly reduced at this time of year and there are additional safety hazards to consider like snow, so it is recommended to only hike during this time if you are very experienced with backcountry conditions.
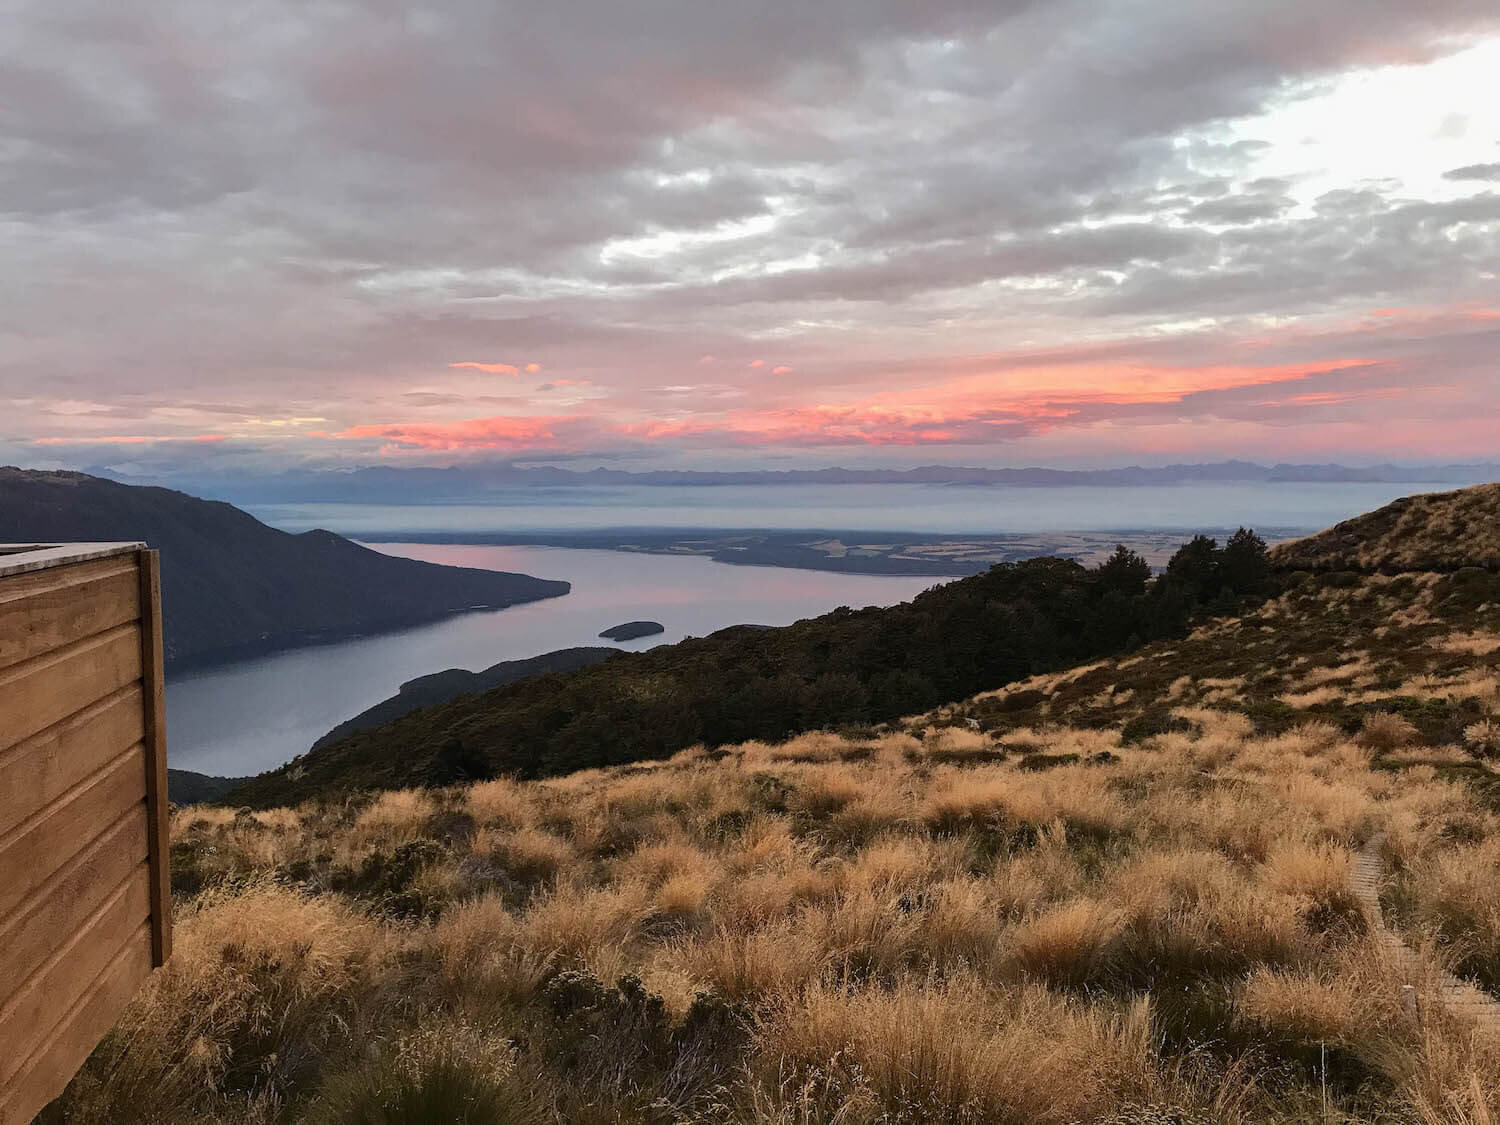
MORNING SUNRISE FROM LUXMORE HUT
Getting To Kepler Track
You’ll want to leave from the town of Te Anau which is just over a 2 hour drive from Queenstown (172kms). If you are driving, you can leave your car at the start of the track at Kepler Track car park. This is 5kms from Te Anau. You can also walk from Fiordland National Park Visitor Centre to the start of the track. This will add on about 50 minutes of walk time but would be a nice walk along the lakefront.
We got going pretty early and drove from Queenstown the morning of the hike but a lot of people choose to stay in Te Anau the night before.
A Slightly Shorter Hike
We decided to shorten our hike ever so slightly and cut out the first part and the last part of the hike.
From Te Anau, we caught a water taxi to Brod Bay which is the first campsite on the Kepler Track. We were able to park our car in Te Anau and this cut 5.6kms (around 1.5hrs) off our hike. The cost for this was $25 per adult and $15 for kids.
At the end of the hike, we got a shuttle from Rainbow Reach car park back to Te Anau which is technically the end of track as it is where the control gate is. It was roughly $20 per person. This cut 9.5kms (2.5 - 3.5hrs) off our hike time. My understanding is that this last part of the track is more of a commute than scenic experience. It takes you back to the Kepler Track car park and finishes the loop.
So we didn’t exactly do the entire Kepler Track loop, but absolutely no regrets about shaving a little bit of hike time off at the start and finish of the track. We hiked 45kms instead of 60kms. I loved catching the water taxi to start the hike and was very excited to see the shuttle bus pull up at the end. I consider myself reasonably fit but I was ready to stop walking!
I think it would be amazing to do the entire loop but the way we did it is also a great option and worth considering.
WE WERE LUCKY ENOUGH TO HAVE GREAT CONDITIONS BUT A GOOD REMINDER THAT THERE ARE RISKS OUT THERE.
Hut Or Campsite?
Both huts and campsites are non-allocated so the first arrivals get the pick of the lot. Something to keep in mind when you will be sharing a hut with 53 other people.
Camping is the cheaper option by far but there are a few things to consider:
There are only 2 campsites along the way with the first campsite 5.6kms from the start of the track. Unless you have had a big day getting there, you’ll probably skip this one. That means that the next one is 22.8kms away (roughly 10hrs) and includes an elevation climb and descent of roughly 1000m. Your next stop will be the end of the track.
You’ll have to carry your tent and sleeping mat. There are some very light ones available these days but you’ll feel every one of those kilos during your hike.
You’re more exposed. If the weather isn’t optimal, being in a tent exposed to the elements can be a bit miserable.
We were happy to spend the extra money and book into the huts. The facilities were excellent. The beds had thick mattresses that were surprisingly comfortable. There were flush toilets and nice common areas with water and gas cooking facilities. There was also a warden at each hut who would give us an entertaining brief each evening about the area and current conditions.
The beds are made up of bunks, some which are super wide bunks with multiple mattresses next to each other - reminded me of sardines in a tin! I did find it a little strange at first to be sleeping in the same room as so many people but I got over it pretty quickly. Earplugs and eye mask recommended as I was regularly kept awake by snoring and flashlights in my eyes from the latecomers. I’m an early riser so I made sure I prepped my breakfast/coffee equipment for easy/quiet access in the morning. I would sneak out early to the common area to enjoy a cuppa and a bit of serenity before the sunrise and awakening of the other lodgers.
AN INCREDIBLE SUNRISE AT MOTURAU HUT
Hiking Food & Water
Does anyone else get excited about hiking food? I love the planning that goes into it - having to be super organised because you won’t have access to a grocery store, the excitement that you are dropping pack weight at every single meal, the portioning so you don’t eat it all at once, the reward of it because you have walked all those kms…I know, the simple things right?
There are so many options when it comes to hiking food so I’m going to keep it simple and base it on typical hiking convenience food - freeze-dried meals. Around Queenstown, most of the major supermarkets will stock a good range of Back Country Cuisine freeze-dried meals. I did see these in a supermarket in Te Anau as well but the range wasn’t as big. We had these for our breakfasts and dinners on the hike and enjoyed them. We doubled up though as we found that 2 serves is really just enough for 1. Since the hike, we have come across a New Zealand company called Radix Nutrition. These are our go-to now as they are focused on nutrition first and use high-quality natural ingredients with no nasties. They’re serving sizes are legit and there are different ranges to suit your activity level as well as those who have special dietary requirements. The only thing is that they only sell online which may be a problem if you are just visiting and don’t have a postal address.
For the rest of your meals and snacks, the supermarkets will have all that you need especially if you go to the ones in the big towns like Queenstown. Keep in mind that you have to carry all of your rubbish in and out so be mindful of weight and packaging.
Drinking water is available at each of the huts, which is awesome! So just carry as much water as you will need for each leg.
Each hut is also equipped with gas burners so you just need to bring your cooking pans/pots, plates, cups and cutlery.
Hiking The Kepler Track
We split the hike into 3 nights and 4 days, staying at each of the huts along the way. As mentioned earlier, you can do it in a shorter amount of time but we wanted to soak in the scenery and spend time exploring each area.
Day 1 - Brod Bay to Luxmore Hut
An upward 8.2km climb with an elevation gain of around 1500m through native beech forest. You are reminded that you have calf muscles and tell yourself you should train them more. Thankfully, you are soon distracted by the beautiful surrounds. It’s cool and sheltered and lush. After some hours, the scenery starts to change and we come across limestone bluffs. It starts to get lighter and warmer as the sun peeks out through the trees. Soon we are above the bush line, greeted with panoramic views of Lake Te Anau and the surrounding mountains. 45 minutes later and we arrive at Luxmore Hut.
Tips:
Be sure to go and check out the Luxmore Caves which are a 10 minute walk from the hut. Pretty amazing! Please be gentle with the environment in there - some of the stalactites had been broken off and that made us sad as they would have taken a long time to form.
The hut warden took us on a nature walk (meeting time was written on a board at the hut entrance) and we learnt lots of interesting things about the flora and fauna of the area. I highly recommend it as there were so many things that we wouldn’t have noticed if we hadn’t gone on the walk. He also gave a very entertaining hut talk later in the evening which included pulling a stoat out of his pocket!! I’ll just leave that there.
Day 2 - Luxmore Hut To Iris Burn Hut
This 14.6km journey across the most epic ridgeline was the highlight for me. We were literally above the clouds and were lucky to have good weather giving us the most amazing views across the south fiord of Lake Te Anau to the Murchison mountains.
Tips:
Before you hit the ridgeline, there is a short climb to a scenic point at Mount Luxmore that is worth taking. You can leave your packs at the base which is what most people do, but make sure everything is secured as the cheeky Kea’s would love nothing more than to take some souvenirs.
This area is very exposed for most of the hike. We had some big gusts of wind and could see how it could be a bit gnarly in bad weather. There are two emergency shelters for a reason along this section so stay aware of the weather conditions and prioritise safety at all times. I have had someone tell me that they had to crawl in some sections!
From Iris Burn Hut, take a 20 minute walk to the Iris Burn Falls and take a very refreshing dip if you dare. Nearer to the hut, the stream fed by the falls for some reason seemed a little less intimidating to jump into. Having said that, I chickened out and didn’t swim in either but Mick was first in and almost everyone else followed.
We had another entertaining hut talk, this time it involved us all singing!
Day 3 - Iris Burn Hut To Moturau Hut
The scenery dramatically changes during this 16.2km leg of the hike. During this hike, we start descending, over a low saddle, through a gorge and podocarp forest. So stunning and so different from the day before. We end our day at Moturau Hut, right on the shore of Lake Manapouri.
Tips:
Hang out on the beach! If the weather is good, soak in some sunshine, lake views and go for a swim. Pleased to say, I got in the water here, we all did! It was incredibly refreshing and reviving.
There is also a little Kiwi habitat in front of the hut - we didn’t spot any but it was cool to walk through and explore.
Day 4 - Moturau Hut to Rainbow Reach
Our final day was an easy 6km walk. We were very grateful for this because our legs were really feeling it by this point. We start out in the forest and again the environment changes as we cross over wetland. It starts to drizzle as we cross a swing bridge. We jump for joy as we come to Rainbow Reach just before the rain kicks in. There are high fives all round and we’re all so stoked to have completed the journey together. Our shuttle bus rocks up soon after and we’re off to our car in Te Anau feeling tired and elated at the same time. I take note of the little voice inside my head telling me that I plan to not get off the couch for the next 3 days knowing that by tomorrow that thought will have passed and I’ll be planning the next adventure.
Tips For Hiking Kepler Track
Before you go, check the weather and any current warnings from DOC
Check-in at the Fiordland National Park Visitor Centre. They will have the most current information on track condition and tips.
Bring mosquito repellant. This is also on my packing list but I thought it was worth a mention!
Hiking poles aren’t just for old people. Honestly, they make such a difference, especially when you are carrying all those extra kilos on your back.
Test out your gear prior - make sure your pack fits well and your shoes are going to go the distance. Getting a sore back from your pack or blisters from your shoes will no doubt ruin the experience.
Bring gear suitable for all conditions. We went in March and we had moments where we were hot, moments where we were very cold and moments where there was rain. Layer up with lightweight clothing so you can adapt to conditions.
Let someone know where you are going.
Know your limits. If the weather turns or you feel like your fitness isn’t up to it - reassess the situation and turn back if you need to.
Packing list
Click here to download a printable version of our Kepler packing list
Gear
Backpack (40–60 litre size for multi-day hiking)
Waterproof pack cover (in case it rains)
Sleeping bag and blow up pillow (or use a hoodie/clothing instead). Sleeping bag liner optional, but we love ours!
First aid kit (including insect repellent, sunscreen, blisterkit, pain killers, anti inflammatories, anthihistamine)
Contact lenses if you wear them (dailies) and spare glasses.
Survival kit (survival blanket, whistle, paper, pencil, high energy snack food)
Earplugs and eye mask
Map of the track
Drink bottle or hydration pack (enough for 1 day)
Eating and cooking utensils (knife, fork, spoon, plate, cup, pot/pan/billy, cleaning kit, tea towel)
Matches or lighter in waterproof container
Toiletries
Torch/flashlight and spare batteries
Rubbish bag
Tickets and ID
Photography equipment, power bank, cables
Hiking poles
If Camping
Tent
Sleeping mat
Clothing
Clothes for hiking and for wearing at night. Try to go for quick dry, stink proof lightweight clothing.
Good hiking boots that are comfortable and well broken in
Socks (wool or polypropylene)
Shorts (quick dry material)
Layers - tops, bottoms and thermal underlayers. We don’t recommend cotton as this gets heavy when wet and takes a long time to dry
Rain jacket and pants
Hat/beanie and gloves
Sunglasses
Extra socks, underwear, shirt/lightweight jersey
Swimwear
Small towel or flannel
Flip flops or lightweight shoes for inside the huts
Food
All your meals! You will eat more than normal so take that into account. Go for high density, nutritious foods to keep you powered!
You will have to carry everything in and out with you, so look for light packaging which is easy to pack down. Use a zip lock bag to put rubbish in which will prevent leakage and smells.
Click here to download a printable version of our Kepler packing list
Now get out there and conquer the Kepler Track!
Have you hiked the Kepler Track? Do you have any more tips for our readers? Let us know in the comments below, we’d love to hear from you.
Jen
Save this for later on Pinterest!


